The Irresistible Charm of Salted Caramel Frosting: A Sweet & Salty Delight
Imagine a frosting that perfectly balances the rich, buttery sweetness of caramel with a hint of crystalline salt, creating an explosion of flavor that tantalizes your taste buds. This isn't just any frosting; it's the legendary salted caramel frosting, a culinary masterpiece that has captivated bakers and dessert lovers worldwide. Far from being an intimidating gourmet creation, a truly crowd-pleasing salted caramel frosting recipe is surprisingly approachable, delivering an unparalleled depth of flavor that elevates any cake, cupcake, or sweet treat it graces. It’s a delightful paradox—sophisticated in taste, yet achievable in your own kitchen.
The magic truly begins with the audacious yet brilliant decision to add a touch of salt to the golden depths of caramel. This simple addition transforms a classic sweet into something extraordinary, cutting through the richness and highlighting the caramel's complex notes. The result is a frosting that’s not just sweet, but profoundly satisfying, leaving a lasting impression that makes it a perennial favorite for gatherings, celebrations, and everyday indulgences. If you've ever thought about making your own, prepare to be amazed at how a few simple ingredients can come together to create such a luscious, unforgettable topping.
Crafting Your Own Irresistible Salted Caramel: A Step-by-Step Guide
The journey to creating the ultimate salted caramel frosting begins with a homemade caramel sauce. While store-bought options exist, dedicating a few extra minutes to making your own caramel from scratch guarantees a depth of flavor and a silken texture that pre-made versions simply can't match. This foundational caramel will be the heart and soul of your frosting, and getting it right is key to an exquisite finish.
The Foundation: Perfecting Your Homemade Caramel Sauce
Your homemade caramel sauce is easier to make than you might think, requiring just a few common ingredients: brown sugar, butter, and milk. The process is straightforward, but patience and attention to detail are your best allies.
1. **Melt and Combine:** Begin by combining the brown sugar, butter, and milk in a medium-sized saucepan. Place the saucepan over low heat. The initial stage is crucial for preventing a grainy caramel, and consequently, a grainy frosting. Stir the ingredients continuously and gently until the butter is completely melted and everything is thoroughly combined. Do not rush this step. Once fully melted, set a timer and continue stirring frequently for at least one minute to ensure a smooth mixture.
2. **Boil and Thicken:** Once the butter is fully integrated, increase the heat to medium. At this point, resist the urge to stir the caramel mixture. Let it come to a rolling boil. The cooking time will vary depending on your pan size and heat, typically ranging from 3 to 6 minutes. For precision, if you have a candy thermometer, cook the sauce until it reaches 230°F (110°C). If you don't have a thermometer, watch for visual cues: the sauce will develop consistent bubbles across its entire surface, and its color will deepen to a rich amber hue. For many, this happens around the 3 to 3.5 minute mark in a wider pan, while smaller pans might take up to 6 minutes.
3. **Cooling Down:** As soon as the caramel reaches the desired temperature or color, remove it from the heat immediately. Carefully transfer the hot caramel sauce into a heat-resistant bowl or a glass measuring cup. Allow the caramel sauce to cool completely to room temperature. This cooling period is essential; as it cools, the caramel will thicken significantly. It's perfectly normal if it appears a little grainy at this stage – this will smooth out beautifully when mixed into the frosting.
Assembling the Silky Smooth Frosting
Once your homemade caramel sauce has cooled, the final stage of assembling your salted caramel frosting is a breeze.
1. **Combine and Conquer:** Transfer the cooled caramel mixture into a large mixing bowl. Add the powdered sugar (also known as confectioners' sugar). This is where the magic really happens, as the caramel transforms into a thick, luxurious frosting.
2. **Season with Salt:** Next, incorporate the sea salt. This is a critical step for achieving that signature sweet and salty balance. Remember that sea salt and table salt have different flavor profiles and intensities. If using table salt, you’ll generally need to use less. Start with a smaller amount and taste as you go, as the sea salt flavor tends to develop and become more pronounced over time. For more specific guidance on selecting the right ingredients for a perfect texture, explore
Ingredient Salted Caramel Frosting: Tips for a Smooth Finish.
3. **Achieve Desired Consistency:** Gradually mix the caramel sauce with the powdered sugar and sea salt until the frosting is fully combined and reaches your desired consistency. If the frosting appears too thick to spread or pipe, add milk a teaspoon at a time, mixing thoroughly after each addition, until you reach a perfectly smooth and spreadable or pipeable texture.
Expert Tips for a Flawless Salted Caramel Frosting
While the steps are clear, a few expert insights can elevate your salted caramel frosting recipe from good to absolutely phenomenal.
* **Graininess Prevention & Solutions:** The initial low-heat stirring of your caramel is paramount. Rushing it can lead to sugar crystals forming, resulting in a grainy sauce. If your finished frosting has a slight graininess, it might be due to undissolved sugar in the caramel or even the powdered sugar. Ensuring your powdered sugar is finely sifted can help. For persistent graininess in the caramel, gentle reheating (before adding powdered sugar) with a splash of milk might help dissolve crystals, but prevention is always best.
* **Salt Balance is Key:** Don't be afraid to taste! The "salted" aspect is what makes this frosting so special. Start with the recommended amount of sea salt, then add tiny pinches until you achieve that perfect equilibrium where the salt enhances, rather than overwhelms, the caramel. Different brands and types of sea salt (fine vs. flaky) will have varying intensities.
* **Temperature Matters:** Ensure your homemade caramel sauce is completely cooled to room temperature before combining it with the powdered sugar. Adding warm caramel will melt the powdered sugar, resulting in a runny, unusable frosting.
* **Butter Quality:** While not explicitly in the caramel recipe provided, if you're adapting this to a buttercream base (which is common for salted caramel frosting), using high-quality, unsalted butter at the correct room temperature is vital for a smooth, stable, and flavorful frosting. For more comprehensive tips on crafting the perfect buttercream base, check out
The Best Salted Caramel Buttercream: Easy Homemade Guide.
* **Adjusting Consistency:** If your frosting is too thick, gradually add milk or cream (one teaspoon at a time) until it reaches your desired consistency. If it's too thin, you can try adding a bit more sifted powdered sugar, a tablespoon at a time, or chilling it for 15-30 minutes to firm it up.
Elevate Your Desserts: How to Use Your Salted Caramel Frosting
Once you’ve mastered this incredible salted caramel frosting recipe, the possibilities for its application are endless. It's truly a versatile topping that can transform humble baked goods into showstopping desserts.
* **Cakes:** This recipe typically yields enough homemade salted caramel icing to generously cover a 9" x 13" sheet cake. For an 8" layer cake, it works beautifully as a filling between layers. If you're looking to frost an entire 8" round cake, you’ll generally need to double the recipe to ensure full coverage and ample decorative swoops.
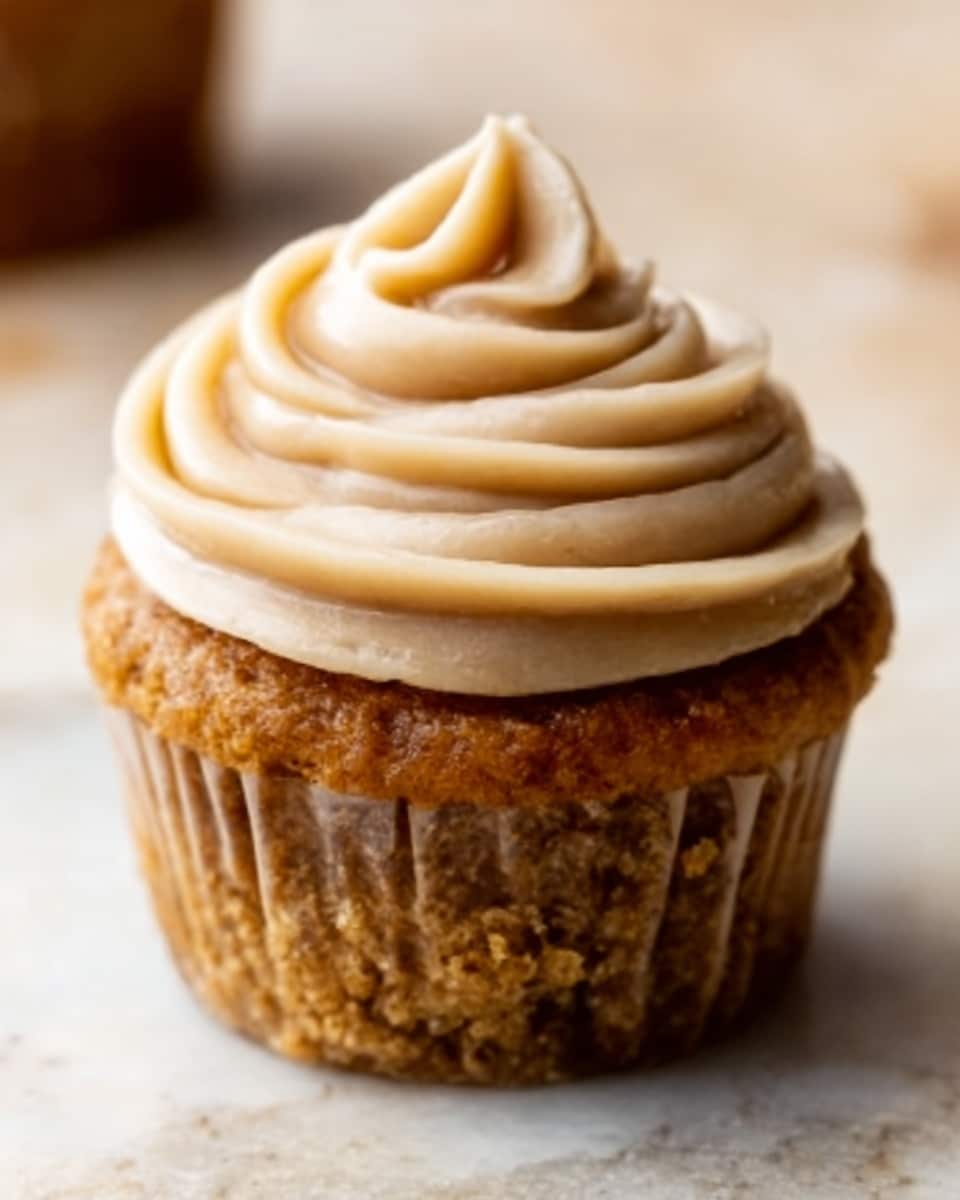
* **Cupcakes:** When it comes to cupcakes, the quantity depends on your decorating style. If you’re applying the frosting with a knife for a rustic, generous dollop, you should be able to frost 10-12 cupcakes. For those who prefer the elegant swirls achieved with a pastry bag and decorative tip, you’ll likely frost 8-9 cupcakes, depending on the size of your swirls.
* **Beyond Cakes and Cupcakes:** Don't limit yourself! Salted caramel frosting is phenomenal as a filling for whoopie pies or sandwich cookies. It makes an incredible topping for brownies, blondies, or even as a decadent dollop on warm apple crisp. Imagine it swirled into a tart shell or simply eaten by the spoonful – it's that good! Its rich, complex flavor pairs beautifully with chocolate, vanilla, banana, and apple-based desserts.
* **Storage:** Store any leftover frosting in an airtight container in the refrigerator for up to a week. Before using it again, allow it to come to room temperature and give it a quick whip with a spoon or electric mixer to restore its creamy texture.
Conclusion
Creating your own salted caramel frosting recipe is a rewarding endeavor that yields a dessert topping far superior to anything you can buy. This irresistible blend of sweet and salty is a guaranteed crowd-pleaser, easier to make than its gourmet reputation suggests, and incredibly versatile. By following these steps and tips, you'll be well on your way to mastering this beloved frosting, ready to cover cakes, cupcakes, and any other sweet treat with a layer of pure, golden deliciousness. So, roll up your sleeves, embrace the joy of homemade, and prepare to delight everyone with your incredible culinary creation!