The Best Salted Caramel Buttercream: An Easy Homemade Guide
Few flavor combinations capture the heart (and palate!) quite like salted caramel. That perfect balance of rich, buttery sweetness meeting a delightful hint of savory salt is simply irresistible. When transformed into a light, fluffy, and decadent buttercream, it becomes a show-stopping addition to any dessert. Forget store-bought shortcuts; crafting the best salted caramel frosting recipe from scratch is surprisingly easy and yields a depth of flavor that's utterly unparalleled. This guide will walk you through creating a homemade salted caramel buttercream that is guaranteed to be a crowd-pleaser, elevating your cakes, cupcakes, and other treats to gourmet status.
Why Salted Caramel Buttercream Reigns Supreme
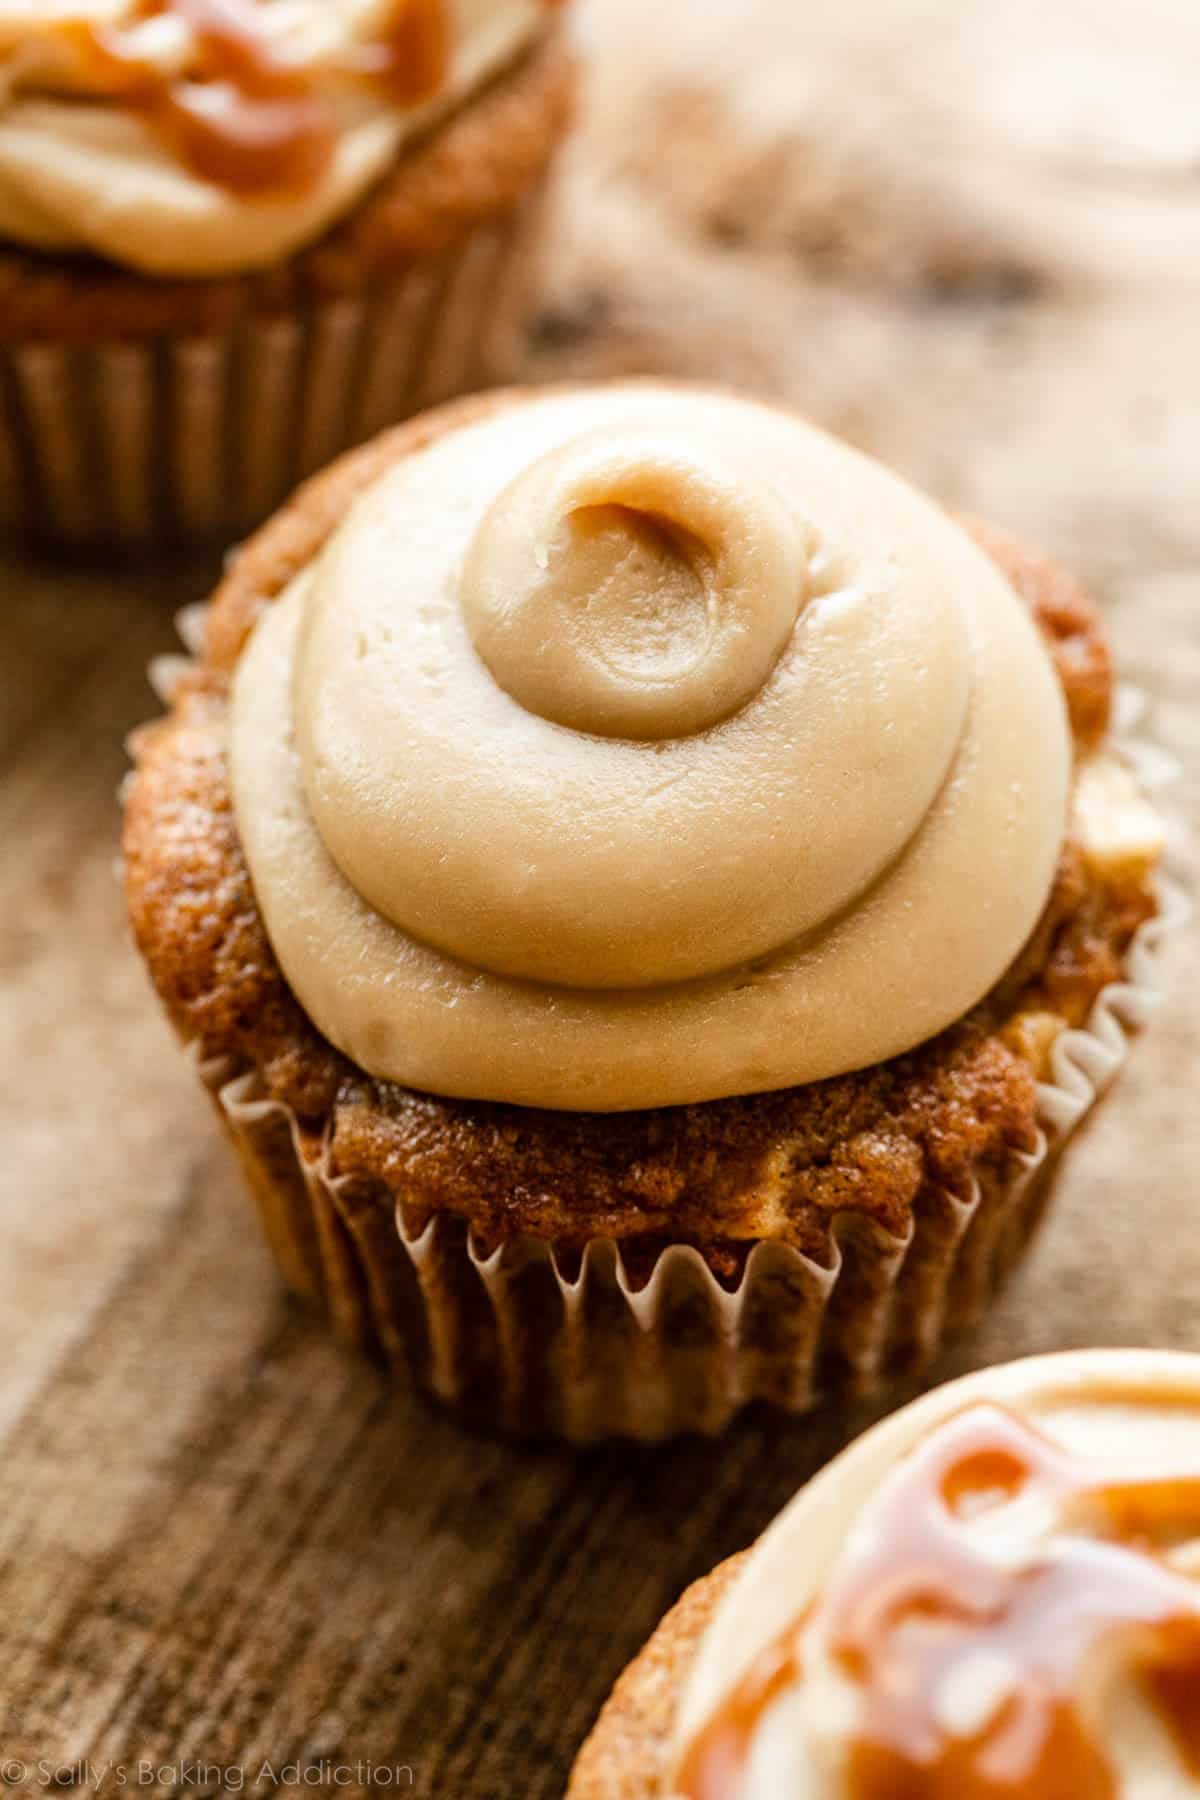
The magic of salted caramel lies in its sophisticated duality. The deep, caramelized sugar notes offer a profound sweetness, which is then brilliantly cut and enhanced by the sharp burst of salt. This contrast prevents the frosting from being overly cloying, making each bite an exciting journey for your taste buds. Beyond its incredible flavor, salted caramel buttercream boasts a beautiful, glossy finish and a texture that is both silky smooth and wonderfully pipeable. It’s incredibly versatile, pairing perfectly with everything from classic vanilla and chocolate cakes to more adventurous apple or coffee-flavored bakes. Imagine a swirl of this golden frosting atop a chocolate cupcake or layered between vanilla cake tiers – it’s a dessert dream come true that always elicits rave reviews.
Crafting Your Perfect Salted Caramel: The Homemade Sauce
The secret to an exceptional salted caramel buttercream lies in building a truly spectacular homemade caramel sauce. This foundational step is crucial, as the quality of your caramel will directly influence the final taste and texture of your frosting. Don't be intimidated; this process is simpler than you might think!
Ingredients for Homemade Caramel Sauce:
- ½ cup (100g) packed light or dark brown sugar
- ¼ cup (57g) unsalted butter, cubed
- ¼ cup (60ml) whole milk
Step-by-Step Caramel Sauce Instructions:
- Combine Ingredients: In a medium, heavy-bottomed saucepan, combine the brown sugar, cubed butter, and milk. A heavy-bottomed pan is highly recommended as it distributes heat more evenly, preventing scorching.
- Melt and Stir: Place the saucepan over low heat. Stir the ingredients continuously until the butter is completely melted and everything is thoroughly combined into a smooth mixture. It’s important not to rush this stage; thorough mixing at low heat prevents the sugar from recrystallizing and potentially leading to a grainy sauce later. Once melted, continue to stir frequently for at least 1 minute, ensuring all sugar crystals dissolve.
- Increase Heat & Cook: Increase the heat to medium. At this point, do not stir the caramel mixture. Allow it to come to a boil. If you have a candy thermometer, cook the sauce until it reaches 230°F (110°C). Without a thermometer, look for visual cues: the mixture should be bubbling vigorously across the entire surface and begin to turn an amber color. This usually takes between 3 to 6 minutes, depending on the size of your pan (smaller pans tend to cook faster). Keep a close eye on it to avoid burning.
- Cool Completely: Carefully remove the saucepan from the heat. Transfer the hot caramel mixture to a heat-resistant bowl or glass measuring cup. This stops the cooking process and allows it to cool more quickly. Let the caramel sauce cool completely to room temperature. As it cools, it will thicken significantly, and you might notice it becomes slightly grainy – this is completely normal at this stage and will be resolved when combined with the other ingredients for the frosting. Do not proceed to the next step until the caramel is fully cooled.
Expert Tip: For the most accurate caramel making, investing in an inexpensive candy thermometer is a game-changer. It takes the guesswork out of reaching the perfect temperature, ensuring a consistent result every time.
Assembling Your Irresistible Salted Caramel Buttercream
Once your homemade caramel sauce has cooled, the fun begins! Combining it with a few other simple ingredients transforms it into the luscious buttercream you've been dreaming of. This is where your Ingredient Salted Caramel Frosting: Tips for a Smooth Finish become paramount for that perfect consistency.
Ingredients for Salted Caramel Buttercream:
- ½ cup (120ml) cooled homemade caramel sauce (from above)
- 4 cups (450g) powdered sugar, sifted
- 1 teaspoon fine sea salt (or ½ teaspoon table salt, adjusted to taste)
- 1-3 tablespoons whole milk, as needed for consistency
Step-by-Step Buttercream Assembly:
- Combine Caramel and Sugar: In a large mixing bowl, add the cooled caramel sauce and the sifted powdered sugar. Sifting the powdered sugar is an important step to prevent lumps and ensure a silky smooth buttercream.
- Add the Salt: Mix in the fine sea salt. It's crucial to understand that sea salt and regular table salt have different flavor profiles and intensities. Sea salt offers a more nuanced, mineral taste and is often less potent by volume than finely ground table salt. If using table salt, start with half the amount (or even less) and taste as you go. Remember, the salt flavor can develop and intensify slightly over time, so it's always better to start with less and add more if needed.
- Mix to Combine: Using an electric mixer (stand or hand-held), start on low speed to gradually combine the caramel sauce, powdered sugar, and salt. Once the dry ingredients are mostly incorporated, increase the speed to medium-high and beat for 3-5 minutes until the frosting is light, fluffy, and well combined. The goal is a smooth, spreadable consistency that still holds its shape.
- Adjust Consistency: If the frosting appears too thick or stiff, add whole milk one teaspoon at a time, mixing well after each addition, until you reach your desired consistency. For piping, you'll want it firm but pliable; for spreading, slightly softer. Conversely, if your frosting is too thin, you can add a tablespoon or two more sifted powdered sugar to thicken it up.
Troubleshooting Tip: If your buttercream feels grainy, it could be due to undissolved sugar crystals in the caramel or unsifted powdered sugar. For the caramel, ensure thorough initial stirring. For the buttercream, always sift your powdered sugar!
Serving Suggestions & Yield Guidelines
This exquisite salted caramel buttercream is incredibly versatile and can transform a simple bake into an extraordinary dessert. Whether you're a seasoned baker or just starting, this frosting is a game-changer.
How Much Frosting Do You Need?
The quantity of frosting required can vary based on your application method (knife vs. piping bag) and how generously you apply it. However, this recipe typically yields enough homemade Crowd-Pleasing Salted Caramel Frosting: Cover Cakes & Cupcakes for several popular options:
- It will generously cover a standard 9" x 13" sheet cake.
- It's sufficient to be a filling layer for an 8" round cake.
- If you're frosting cupcakes, you should be able to frost 10-12 cupcakes using a knife for spreading.
- For those who love elaborate swirls with a pastry bag, this recipe will typically frost 8-9 cupcakes, depending on the size of your swirls.
- If you plan to frost an entire 8" layer cake (both filling and exterior), we recommend doubling the recipe to ensure you have plenty for thick, even layers and beautiful decorations.
Expert Tip: Leftover buttercream can be stored in an airtight container in the refrigerator for up to a week. Before using, let it come to room temperature and then re-whip it with your electric mixer for a few minutes until it regains its smooth, fluffy consistency.
Conclusion
There you have it – a comprehensive guide to crafting the best homemade salted caramel buttercream. This salted caramel frosting recipe proves that irresistible flavor doesn't have to be complicated. With a little patience and attention to detail, especially during the caramel-making phase, you can create a frosting that is rich, perfectly balanced, and wonderfully smooth. This homemade delight is sure to become a staple in your baking repertoire, guaranteeing smiles and satisfied sweet cravings every time. So go ahead, whip up a batch, and let the sweet-and-salty magic unfold!
