Unlock the Secret to Silky Smooth Salted Caramel Frosting
There's something truly magical about salted caramel. That perfect balance of sweet and savory, rich and comforting, makes it an undeniable favorite in desserts. When transformed into a frosting, it elevates cakes, cupcakes, and cookies to an extraordinary level. But the dream of decadent, melt-in-your-mouth salted caramel frosting can quickly turn into a grainy nightmare if not handled with care. Fear not, aspiring bakers! This comprehensive guide to a truly exceptional salted caramel frosting recipe will walk you through every step, ensuring a smooth, luscious finish every single time.
Forget the myth that homemade caramel is complicated. With just a few simple ingredients and careful attention to technique, you'll be whipping up this crowd-pleasing delight that's easier to make than you might think. We'll dive into the critical steps, from crafting the perfect caramel base to blending it into a velvety frosting, all while sharing expert tips for achieving that coveted silky texture. For a deeper dive into making the perfect base, check out our guide on The Best Salted Caramel Buttercream: Easy Homemade Guide.
Crafting the Perfect Salted Caramel Base for Your Frosting
The secret to a flawlessly smooth salted caramel frosting begins with its foundation: a perfectly executed homemade caramel sauce. This isn't just about flavor; it's about texture. Any graininess in your caramel will translate directly into your finished frosting, so precision here is paramount.
The Foundation: Homemade Caramel Sauce Ingredients & Process
For your caramel sauce, you'll typically need just three core ingredients: brown sugar, butter, and milk. Each plays a vital role:
- Brown Sugar: Provides depth of flavor and a slightly chewy quality compared to white sugar. Its molasses content contributes to the rich color and taste.
- Butter: Adds richness, helps prevent crystallization, and contributes to the creamy texture. Opt for unsalted butter so you can control the salt content precisely later.
- Milk: Acts as a liquid component, helping to dissolve the sugar and create a smooth sauce.
Here’s how to create a smooth caramel base, focusing on techniques that prevent graininess:
- Initial Blend on Low Heat: Combine brown sugar, butter, and milk in a medium saucepan. Start on low heat, stirring continuously until the butter is completely melted and all ingredients are thoroughly combined. This initial low-heat phase is crucial. Rushing it can lead to undissolved sugar crystals, which are the primary culprits behind grainy caramel. Stir often, ensuring everything is homogenous before moving on. Once melted, continue stirring for at least a full minute to ensure all sugar crystals have dissolved.
- Increase Heat, Cease Stirring: Once everything is melted and combined, increase the heat to medium. At this stage, it's vital to *stop stirring*. Stirring while the caramel boils can introduce air and encourage sugar crystals to form on the sides of the pan, which can then fall back into the sauce, creating graininess.
- Achieving the Right Temperature & Color: Cook the mixture for approximately 3-6 minutes, depending on your pan size. If you have a candy thermometer, aim for 230°F (110°C). Without one, look for consistent bubbling across the entire surface and a rich, amber color. A smaller pan might take longer (up to 6 minutes), while a larger pan could be ready in as little as 3-3.5 minutes. Don't be afraid to trust your eyes; that beautiful amber hue is your indicator of readiness.
- Cooling for Success: Promptly remove the caramel from the heat and transfer it to a heat-resistant bowl or glass measuring cup. This stops the cooking process and prevents over-caramelization. Allow the caramel sauce to cool completely to room temperature. As it cools, it will thicken significantly. It's normal for it to appear a little grainy at this stage; this is usually due to crystallization during cooling, which we'll address when we blend it with powdered sugar.
Why a Smooth Caramel Matters for Your Frosting
The quality of your caramel directly impacts your frosting's final texture. If your caramel base is grainy, your frosting will be grainy. By meticulously following the steps above—especially the initial low-heat stirring and then resisting the urge to stir during boiling—you significantly reduce the risk of crystallization. The goal is a uniform, dissolved sugar solution that will emulsify beautifully with the other frosting ingredients.
Assembling Your Silky Salted Caramel Frosting Recipe
Once your homemade caramel sauce has cooled, it's time to bring everything together to create that irresistible, smooth frosting. This stage is where powdered sugar and a touch of salt transform the caramel into a spreadable, delectable treat.
Key Ingredients for Frosting Perfection
Beyond your cooled caramel, you'll need just a couple more essential ingredients:
- Powdered Sugar (Confectioners' Sugar): This is the bulking agent and sweetens the frosting. Its finely milled texture is key to a smooth finish. For absolute perfection, we recommend sifting your powdered sugar before use (more on this in our expert tips!).
- Sea Salt: The star ingredient that balances the sweetness of the caramel. Sea salt offers a more nuanced flavor profile than regular table salt. It also contains trace minerals that contribute to its unique taste.
- Milk (optional, for consistency): A small amount of milk (or even cream) can be added a teaspoon at a time to achieve your desired frosting consistency if it's too thick.
The Mixing Process for Unrivalled Smoothness
The way you combine these ingredients is crucial for a smooth result:
- Combine Caramel and Powdered Sugar: In a large mixing bowl, add your cooled caramel sauce and the sifted powdered sugar. Starting with cooled caramel is important, as hot caramel would melt the powdered sugar too quickly and potentially make the frosting greasy or overly thin.
- Gradual Mixing: Begin mixing on a low speed, gradually increasing to medium. This helps prevent a sugar cloud from engulfing your kitchen and ensures the ingredients incorporate slowly and evenly. Mix until the caramel sauce and powdered sugar are fully combined and the frosting appears smooth. Don't rush this process; give the mixer time to work out any lumps.
- Add the Salt: Once the initial mix is smooth, add the sea salt. Remember, sea salt has a different intensity than table salt, so you might need slightly less if using regular table salt. Start with a smaller amount, mix, and then taste. The salted caramel flavor will develop further over time, so be cautious not to over-salt initially. You can always add more, but you can't take it away!
- Adjusting Consistency: If your frosting appears too thick after mixing, add milk, a teaspoon at a time, mixing thoroughly after each addition until you reach your desired spreadable consistency. Conversely, if your frosting is too thin, you can try adding a bit more sifted powdered sugar (a tablespoon at a time) or chilling it slightly.
Throughout the mixing process, occasionally scrape down the sides and bottom of your bowl with a spatula. This ensures all ingredients are uniformly incorporated, preventing pockets of unmixed sugar or caramel.
Expert Tips for a Flawless, Smooth Finish
Beyond the basic steps, these professional insights will help you achieve a truly flawless, smooth finish for your salted caramel frosting recipe.
Sifting is Your Secret Weapon
This is arguably one of the most important tips for any smooth frosting: always sift your powdered sugar. Powdered sugar, especially when it sits in the pantry, tends to clump together due to moisture and the addition of cornstarch (an anti-caking agent). These tiny clumps will stubbornly resist dissolving in your frosting, leaving you with an unpleasantly grainy texture. Sifting removes these lumps, ensuring a uniformly fine powder that blends seamlessly into your caramel base.
Temperature Control: A Game Changer
The temperature of your ingredients significantly impacts the final texture. Ensure your homemade caramel sauce is completely cooled to room temperature before mixing it with the powdered sugar. If the caramel is even slightly warm, it can partially melt the sugar, leading to a thinner, potentially greasy, or grainy frosting. While this recipe doesn't explicitly involve creaming butter at room temperature (as in some traditional buttercreams), if you adapt it or use a variation that does, ensure any butter used is also at a perfect room temperature – soft enough to indent easily, but not melted.
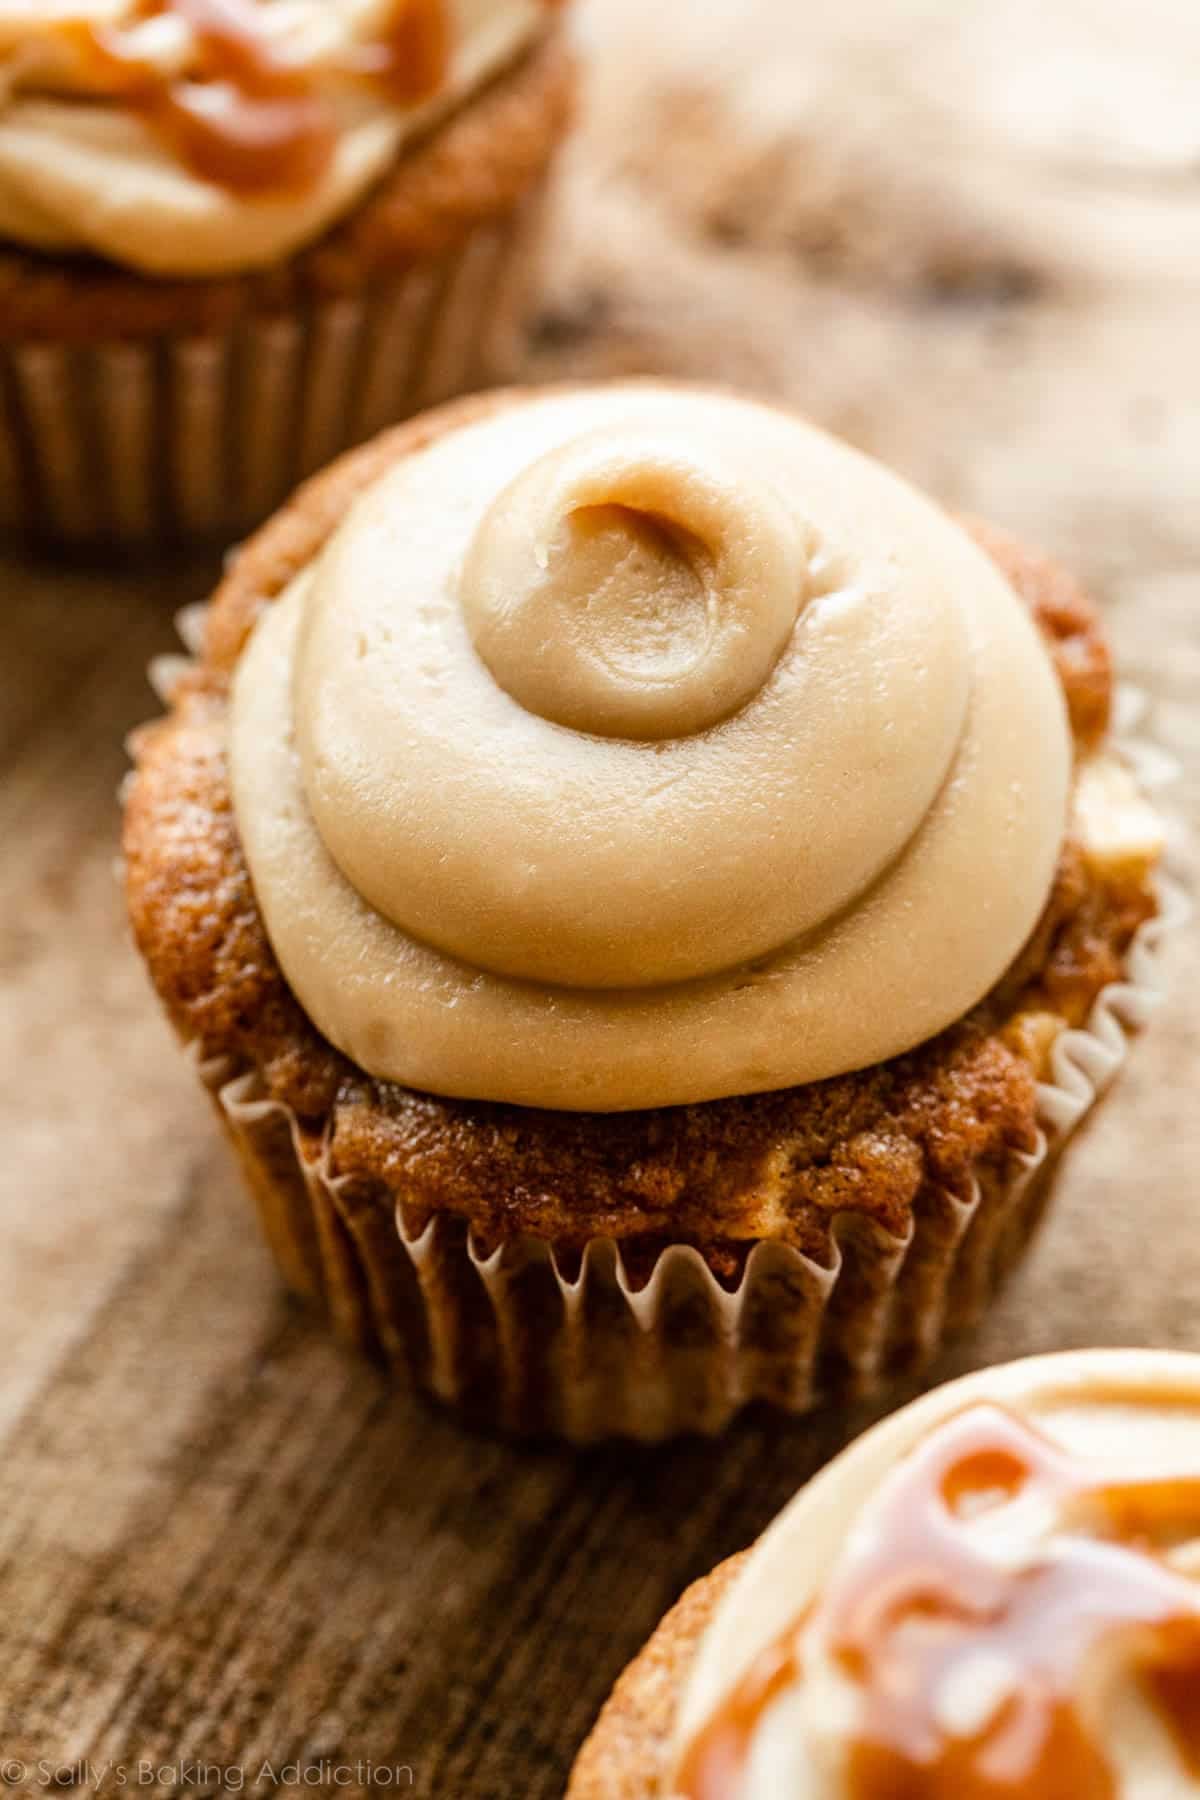
Achieving the Perfect Consistency
The ideal consistency for salted caramel frosting is smooth, spreadable, and holds its shape well. This allows it to be piped beautifully or spread evenly.
- If too thick: Add milk or cream, 1 teaspoon at a time, mixing well after each addition until desired consistency is reached.
- If too thin: Add more sifted powdered sugar, 1 tablespoon at a time, mixing until incorporated. Chilling the frosting for 15-30 minutes can also help it firm up slightly.
The Magic of Salt
The "salted" in salted caramel is not just an adjective; it's a flavor enhancer. Always taste your frosting before declaring it done. Add salt gradually, especially if you're unsure about the strength of your particular sea salt. Remember, the salt flavor often intensifies slightly as the frosting rests, so starting cautiously is a good strategy. A good rule of thumb is to add just enough salt to highlight the caramel without making the frosting taste overtly salty on its own.
Serving Suggestions & Storage for Your Crowd-Pleasing Salted Caramel Frosting
Now that you've mastered this amazing salted caramel frosting recipe, it's time to put it to good use! This versatile frosting is perfect for a wide array of baked goods.
Our recipe typically yields enough homemade salted caramel frosting to generously cover a 9" x 13" sheet cake, or it can serve as a luxurious filling layer for an 8" two-layer cake. If you're frosting cupcakes, you should be able to cover about 10-12 cupcakes if applied with a knife. For those who prefer to pipe their frosting using a pastry bag, expect to frost 8-9 cupcakes, depending on the size of your swirls. If you're aiming to frost an entire 8" round cake (top and sides), consider making a double batch to ensure you have plenty. For more ideas on how much frosting you'll need, read our guide on Crowd-Pleasing Salted Caramel Frosting: Cover Cakes & Cupcakes.
Storage Tips:
Store leftover salted caramel frosting in an airtight container in the refrigerator for up to 5-7 days. When ready to use again, let it come to room temperature and give it a good whip with an electric mixer to restore its fluffy, smooth consistency.
Conclusion
Creating a perfectly smooth and irresistibly delicious salted caramel frosting doesn't have to be intimidating. By focusing on the quality of your caramel base, carefully sifting your powdered sugar, and paying attention to temperature and mixing techniques, you can achieve a professional-quality finish every time. This salted caramel frosting recipe is more than just a topping; it's an experience—a delightful blend of sweet and salty that will impress anyone who tastes it. So, gather your ingredients, follow these tips, and prepare to elevate your baking to new heights!
